How to Cleanup and Refine Meshes in MeshLab
If you have a 3D mesh with imperfections, maybe if it was generated through 3D scanning, it can be difficult to print or even render it perfectly, and you need to clean it up. One of the tools that you can use to clean up your meshes is MeshLab. It is free, and you can also use it to perform various actions like analysis, editing, and visualization. Below, we break down the steps that you can follow to clean up and refine your meshes.
Overview of MeshLab and Importing the Mesh
Visit MeshLab website to download the software. It is available in various operating systems like Windows, macOS, and Linux. Once you download the most appropriate version for your computer, install and launch it, and you will see the interface below.
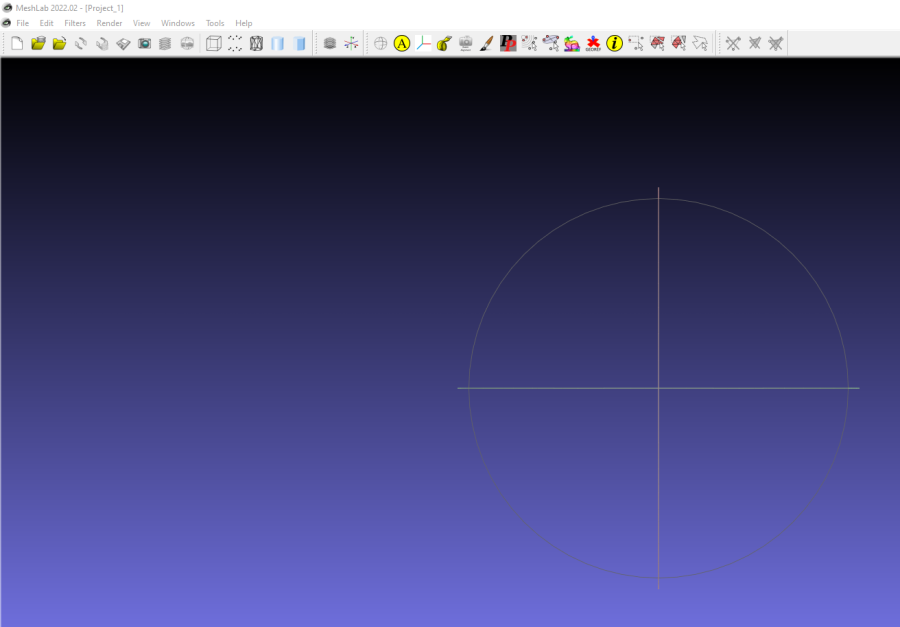
On the top section, there is the menu bar where you can access various categories of tools, and just below it, you will see individual tools. Some of the key tools that you can use for cleaning and refining meshes are listed below. You can find them on the Filters section of the menu bar.
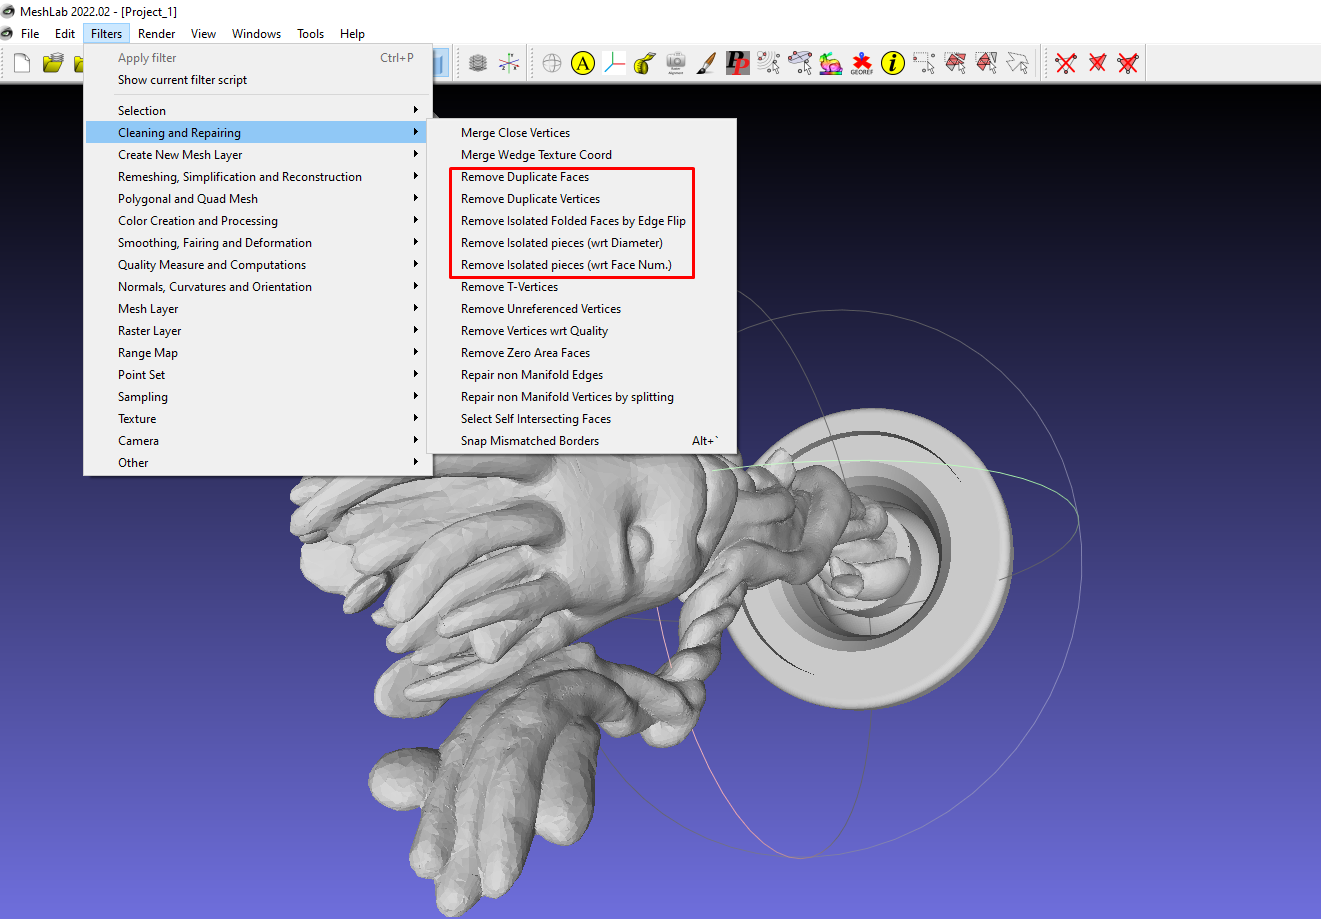
- Cleaning and repairing: In this section, you will find options to remove duplicate faces and vertices in your meshes. An option to remove isolated faces, and delete faces that are not connected to the rest of the mesh. There are also other options like removing isolated vertices, eliminating faces with zero areas, removing unreferenced vertices and even an optin to remove duplicate edges and fill holes.
- Smoothing, fairing, and deformation options: In this section, there are various features like Laplacian smooth that you can use to apply a Laplacian smoothing algorithm on the mesh. There is also taubin smooth for performing a Taubin smoothing operation. The noise reduction option in this section also helps reduce noises in the mesh, and finally, there is sharpening option for enhancing sharp edges and features on the mesh.
- Simplification, remeshing, and reconstruction: In this section, you will find options for filling holes, simplifying the meshes by collapsing edges and, based on vertex clustering, an option to reconstruct meshes from a point cloud and many others.
- Geometric and topological filters: These filters apply various subdivision schemes to the mesh, computes the convex hull, curvature and orientation information of the mesh, convert the mesh into a voxel representation, and there is an option to calculate the volume enclosed by the mesh.
- Texture options: You can use these filters to apply textures and UV mapping to the mesh.
Before using the tools, you need to import the mesh you want to work on. To do this, go to File > Import.
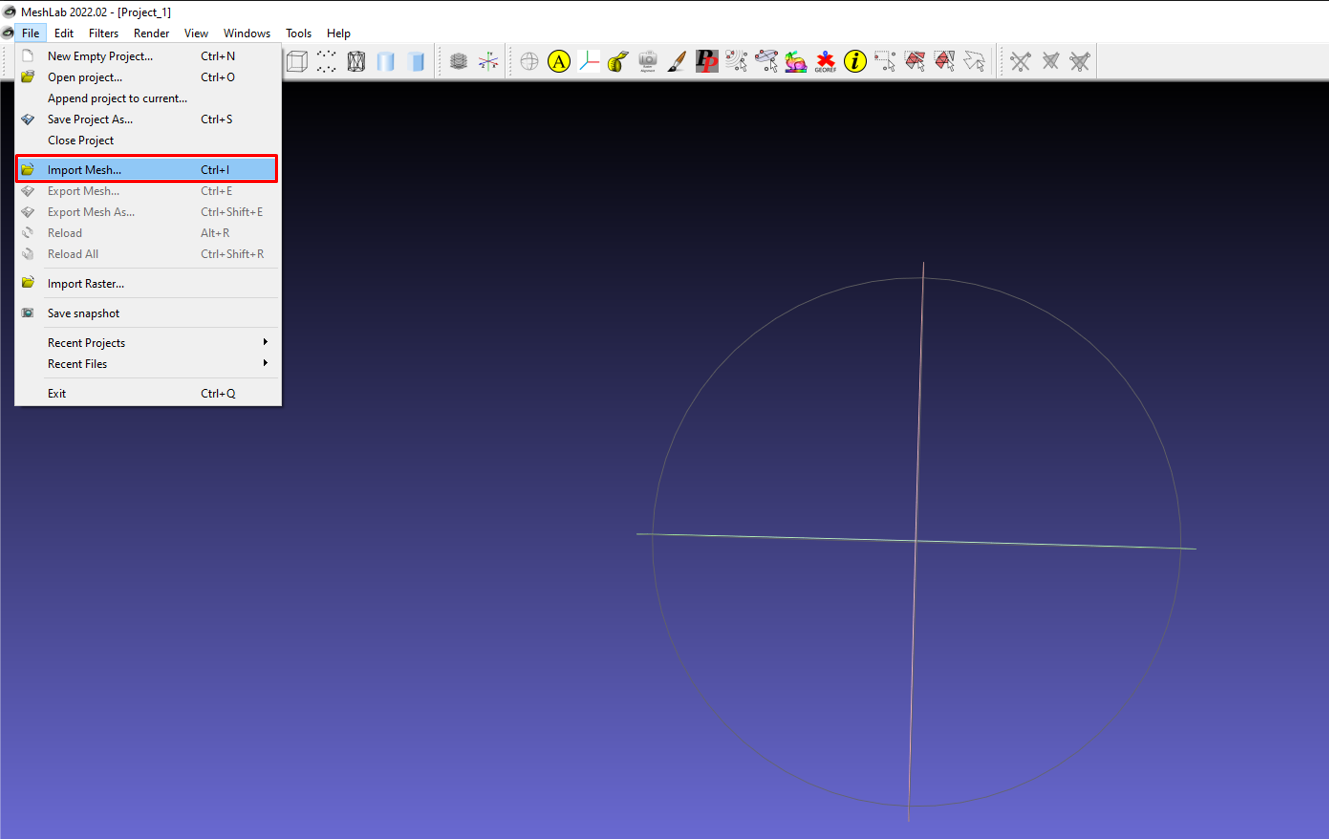
Then go to where you have stored your file and import it. You can visualise and inspect your mesh by rotating and panning around to check for issues.
Cleaning up the mesh
Cleaning up the mesh involves removing duplicate faces and vertices and also removing isolated folded faces and pieces. It also involves filling holes in the design and repairing non-manifold faces, edges, and vertices in your meshes. These help ensure your mesh is ready for 3D printing, 3D rendering, and animation and you can export it to other 3D model maker programs when they don’t have issues.
To remove duplicate elements and isolated faces and pieces, you will go to Filters > Cleaning and Repairing.
Once you choose any operation to perform, you will see a window popping up on the bottom right section of the interface, showing if the issue was successfully fixed. For example, if I choose Remove duplicate faces, you will see a message saying that two faces were successfully deleted.
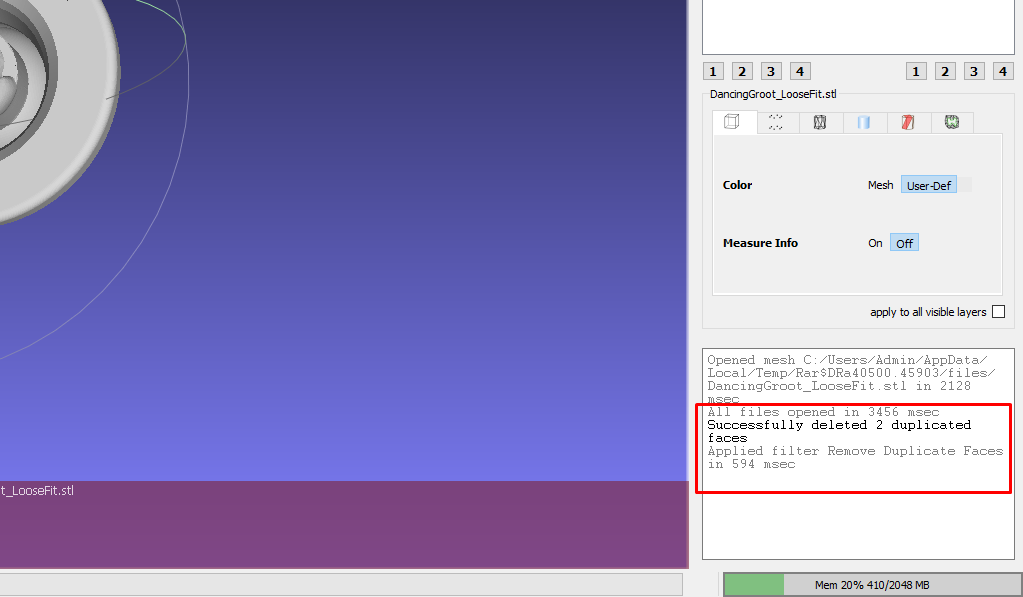
You can do the same with the other options, too.
Repairing Non-Manifold Geometry and Filling Holes
Non-manifold geometry in a 3D mesh is where the structure has irregularities. For example, it can be difficult to tell what the inside and outside look like. Also, it can have other issues like edges shared by more than two faces or even vertices that are not attached to any face or edge. If you don’t fix manifold issues, it can be hard to apply other filter settings. For example, I get the error below if I try to remove holes.
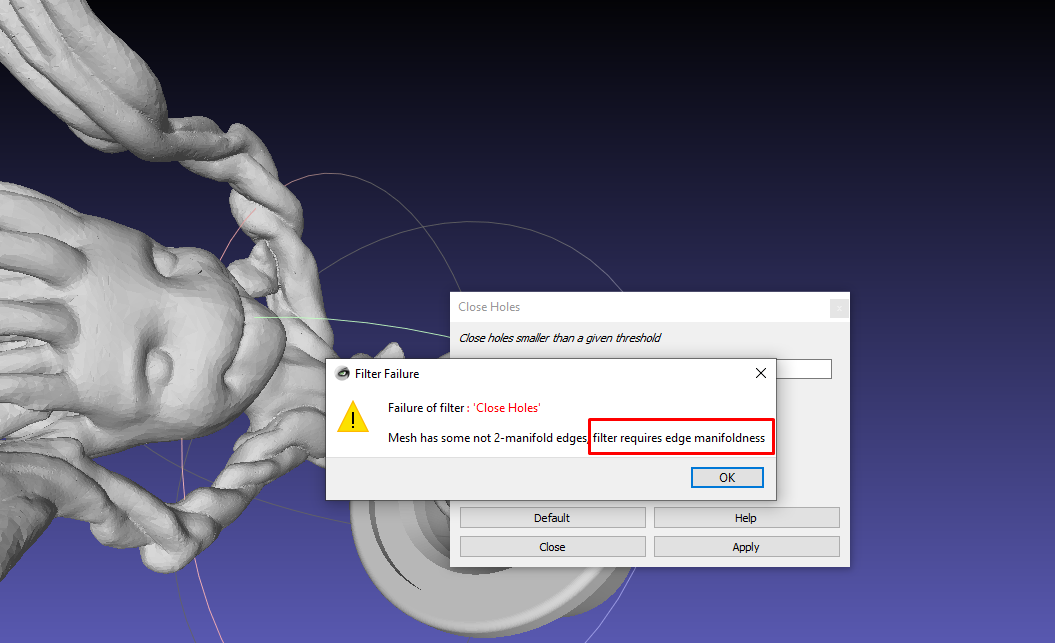
Go to Filters > Cleaning and Repairing > Remove non-manifold edges to fix this.
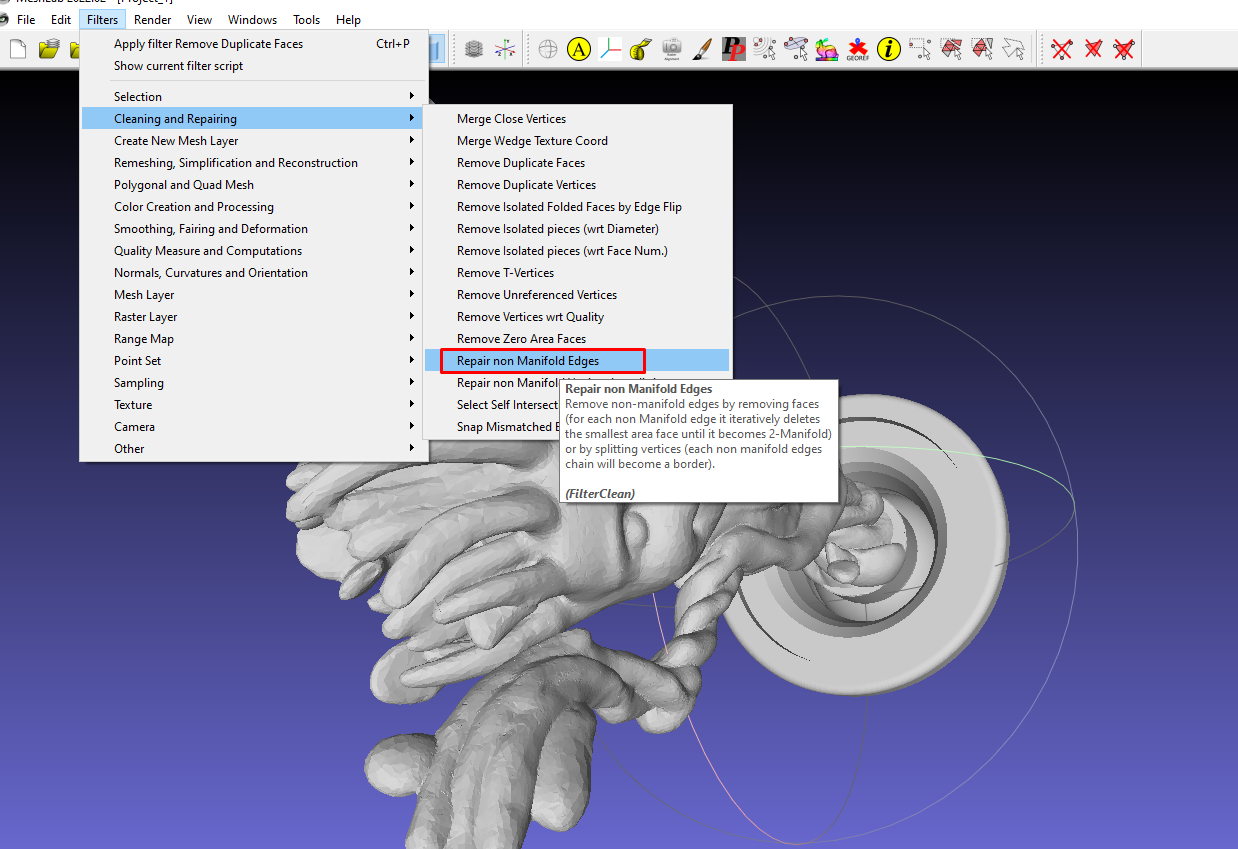
In the new window that launches, select Remove Faces.

If your mesh has holes, remove them by going to Filters > Remeshing, Simplification, and Reconstruction > Close Holes.
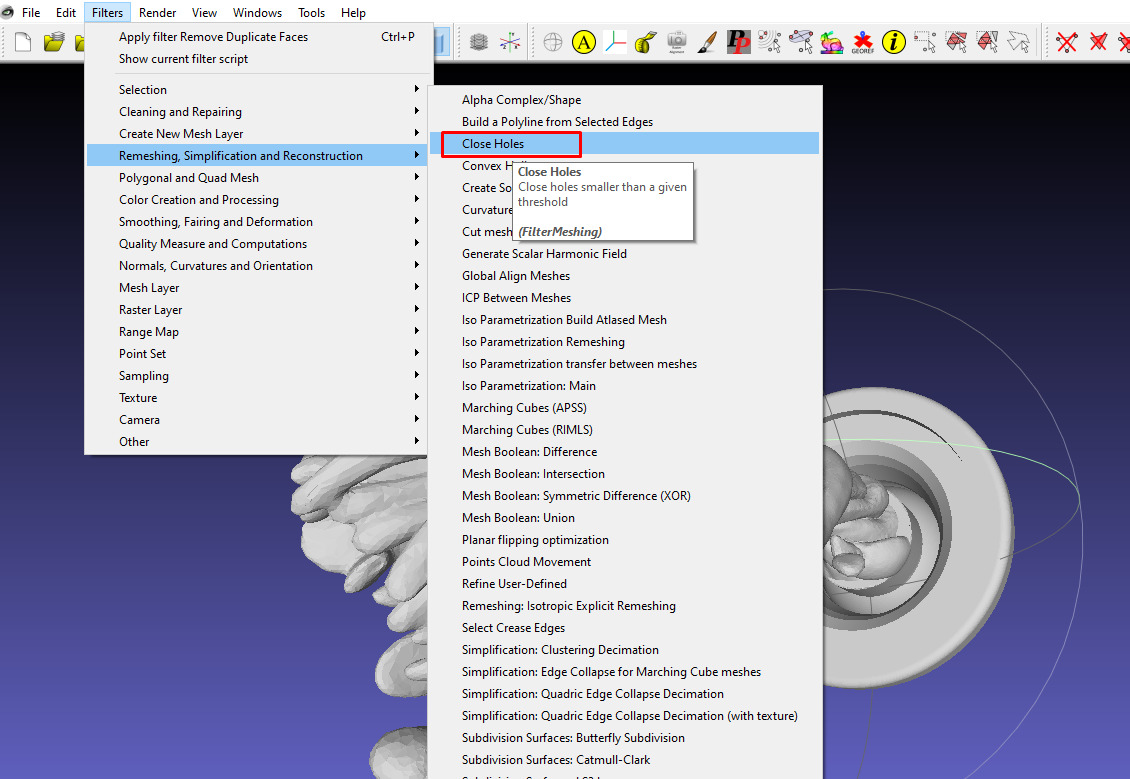
After applying, I got the message below, indicating that one hole was closed and one new face added.
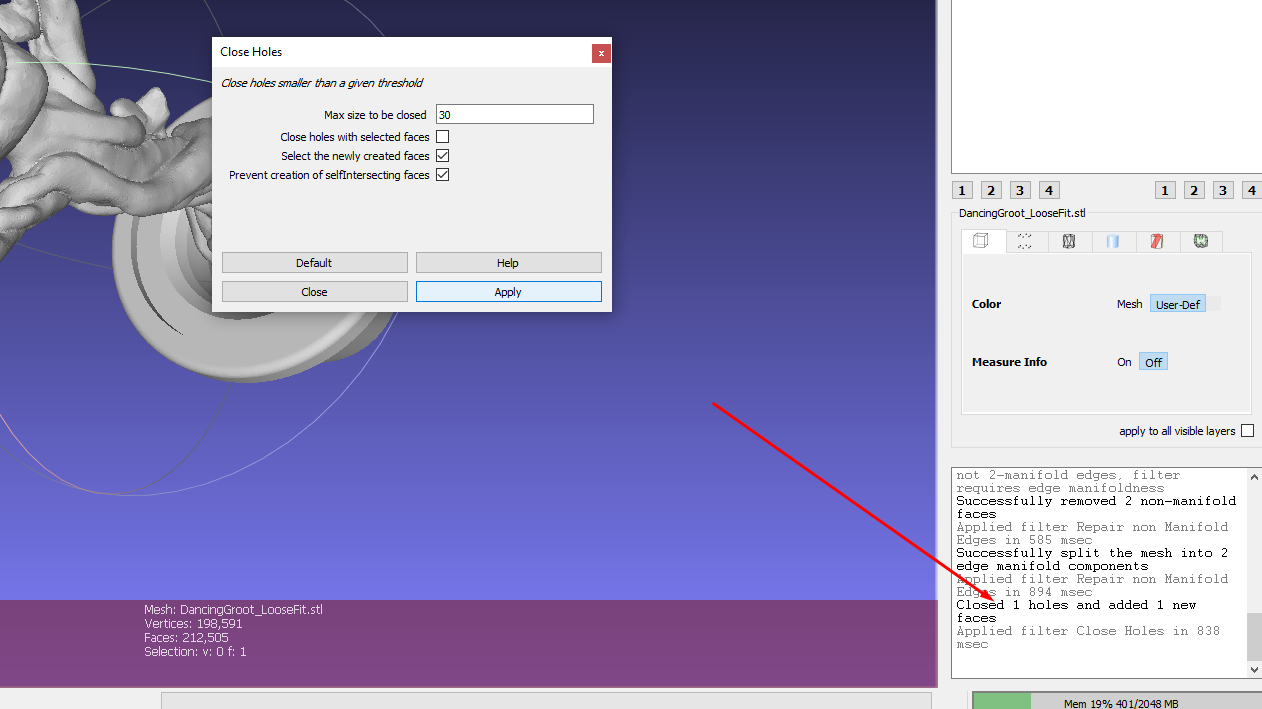
After filling the holes, you can inspect it to ensure that there are no unwanted issues introduced when you were filling holes.
Checking the Quality of the Mesh and Exporting
After you clean the mesh, you can check its quality by going to Filters > Quality Measure and Computations>Compute Geometric Measures.
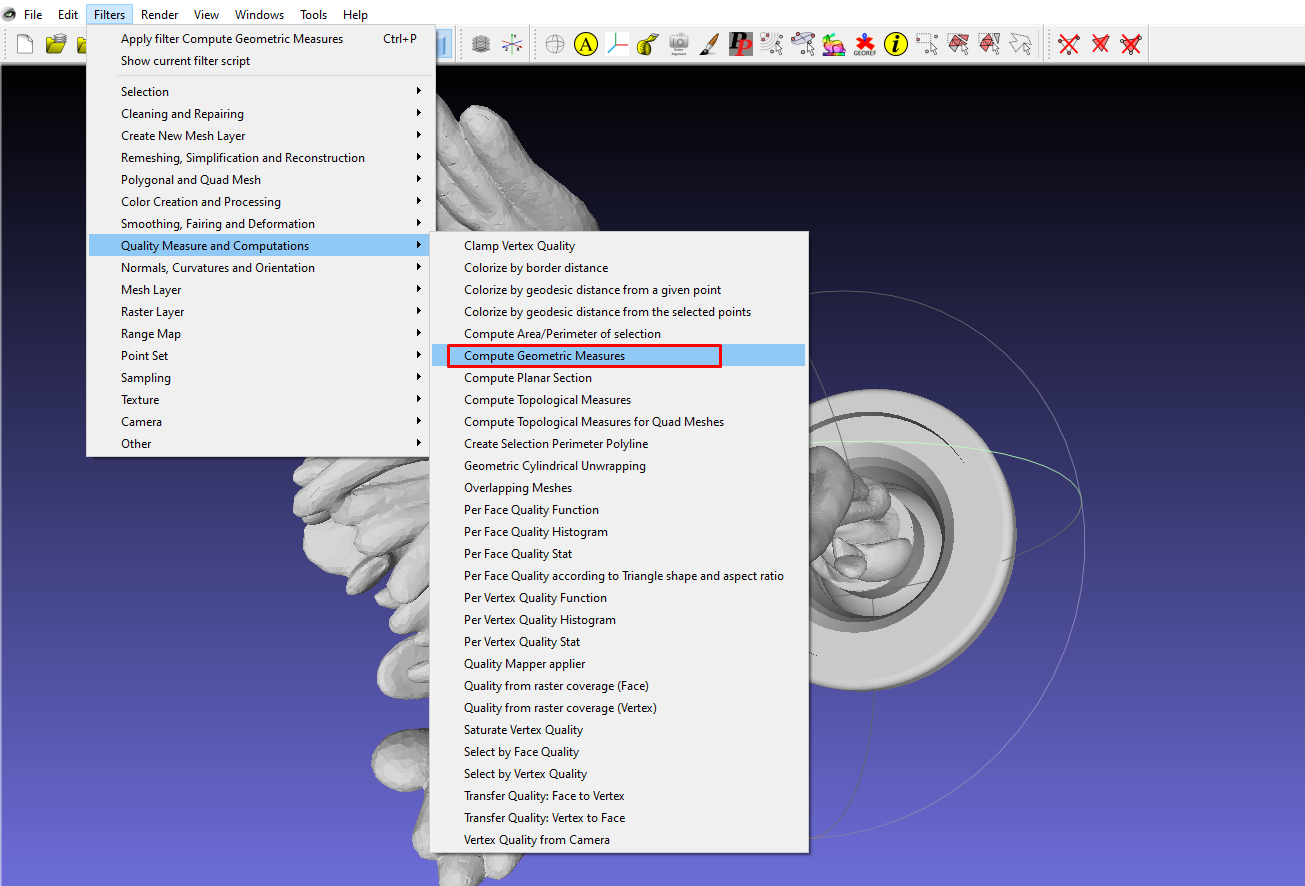
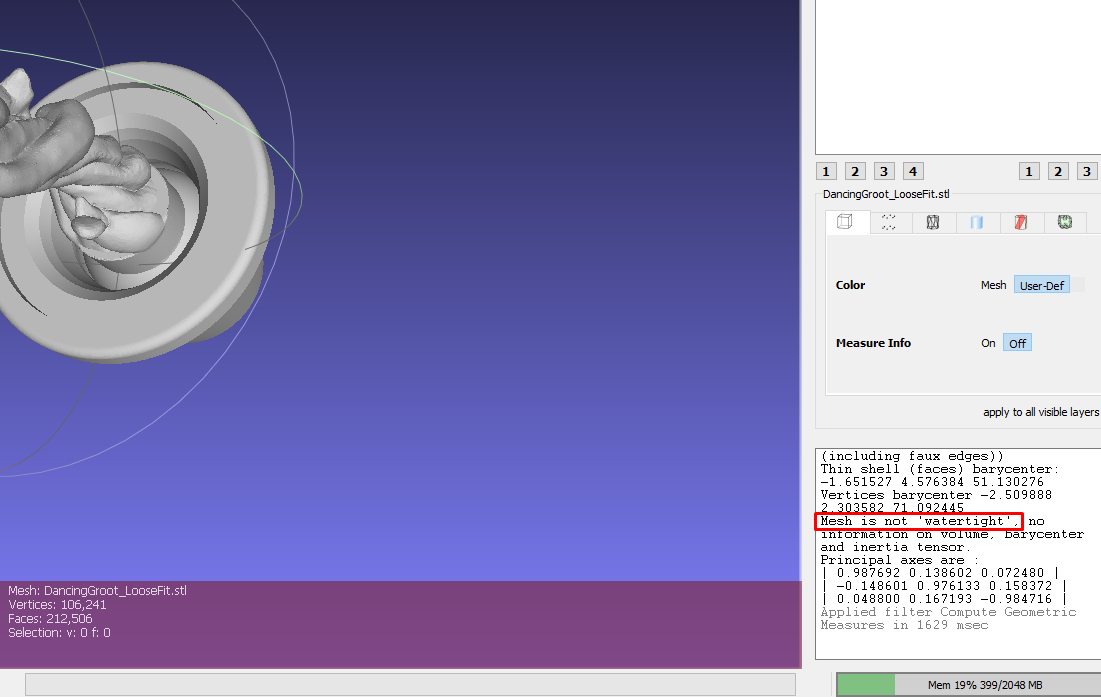
You will see the details in the bottom-right section. After analysis, I noticed a section in the bottom-right section saying the mesh is not watertight. This is because there are holes that still need to be fixed.
You can also smooth your mesh by going to Filters > Smoothing, fairing, and deformation, then choose from the options provided.

To export the mesh after cleaning up, go to File > Export mesh.
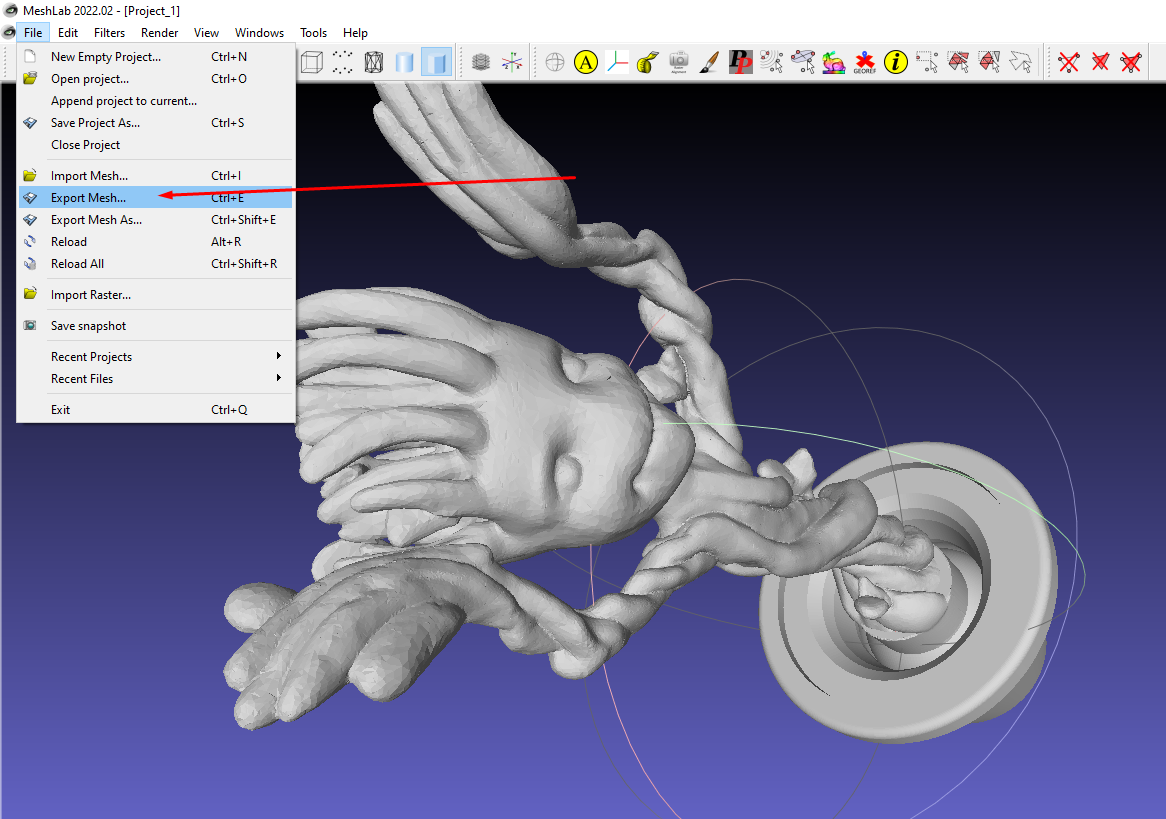
You have now successfully cleaned a mesh in MeshLab.